Electrolysis Rust Removal System
Over the years I've cleaned up lots of rusty tools and parts. I've always wanted to build an electrolysis rust removing system, finally I had a good opportunity to do this when the lathe came to the space. This works by putting your part to be de-rusted into a water bath. Electricity is passed through the system by attaching a cathode (negative) to your part and an anode to another piece of metal in the same solution. Iron particles are loosened up and transferred to the sacrificial metal attached to the anode. Most sites recommend mixing about 1tbl spoon of soda ash per-gallon into the water to help the process. Arm & Hammer Washing Soda will work (not baking soda), I found some generic scrubbing cleaner for $1.64 which contained soda ash at the grocery store.
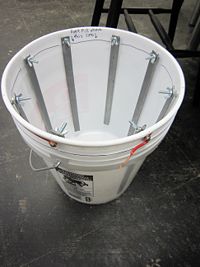
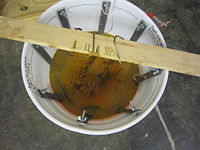
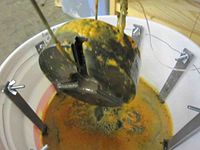
Notice that the steel slats are all connected around the outside of the bucket with wire. I used wing-nuts to attach the slats so that they can be removed and cleaned with relative ease. I'd recommend keeping the water below the point where your electrical connections are to reduce degradation of the electrical connection (where the slats connect to the bolts). Remember, the cathode (negative) goes to the part, the anode (positive) goes to the sacrificial metal. Otherwise you will be enhancing the rusting action of your part rather than reversing it!
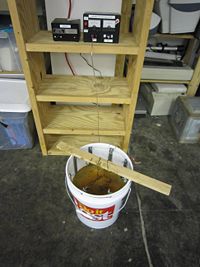
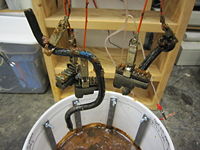
A lot of folks use a car battery charger which is fine, however we did not have one of those on-hand. I grabbed a little 13V power supply off the shelf and ran it through a power regulator I built a while back. The regulator is just an LM317 mounted inside this enclosure along with Amp and Voltage indicators. It allows you to turn just about any common fixed-voltage DC power supply into a regulated, variable-voltage supply. It also is an easy way to monitor and limit current output. Since I wasn't sure how much current this would draw I decided I wanted to view and control that:
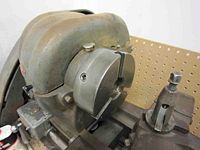
The first thing we used this on was the lathe chuck. You can see how dark and rusted it was before, and after 24 hours of running it came out nearly as you see in the picture. A small amount of wire-brush time was spent after taking it out of the electrolysis bath but that mostly removed grime which did not want to come off before the bath.
I have to throw a shout out to this guy's project, I really liked the way he did his version, you may notice a similarity: http://ct-web2.unh.edu/lee/electrolysis.htm
